これまでの流れ:
1:急にiDempiere に興味を持った。
2:iDmpiere を使うためにAWS(Amazon Web Services) アカウントを作成することにした。
3:AWS にEC2 インスタンスを作成し、 CentOS をセットアップすることにした。
4: SSHの設定をして外部からアクセスできる様にしてみた。
5:コマンドラインでは使いにくいのでデスクトップ環境を作ってみた。
6-1:iDempiere に必要なDB (PostgreSQL8.4)をインストールしてみた。が失敗した。
6-2:PostgreSQL9.3をインストールしてみたがまた失敗した。
先日 PostgresSQL8.4 をインストールしたときの残骸が悪さをしていると、ネットなどで原因調査するときに混乱の元になる恐れもあり、CentOS6.5 のインスタンス作成からやり直すことにした。
で、とりあえず以前作ったCentOS6.5 インスタンスは停止(放棄)
新しく以前ここで書いた手順通りに実行。(いくつか間違いも発見したのでついでに訂正)
さ、PostgreSQLインストールしよう。
その前に インターネットブラウザのインストール。
System -> Administration -> Add/Remove Software
で、 firefox とかで検索して、 Mozilla Firefox Web browser にチェックを入れてapplyする。

いよいよ PostgresSQL9.3 のインストール。
CentOS6.5 は標準で PostgreSQL8.4が入っているので、焦らずネットから 9.x を持ってくる。
9.4は Beta version とのこと。9.3 にしておこう。
http://yum.postgresql.org/repopackages.php#pg93

関係するパッケージの推奨や、root のパスワード入力を経てインストール完了。
PostgresSql9.3 で、 CentOS 6 - x86 64 をクリック。するとすぐさまrpm(セットアップ)の確認画面が。。
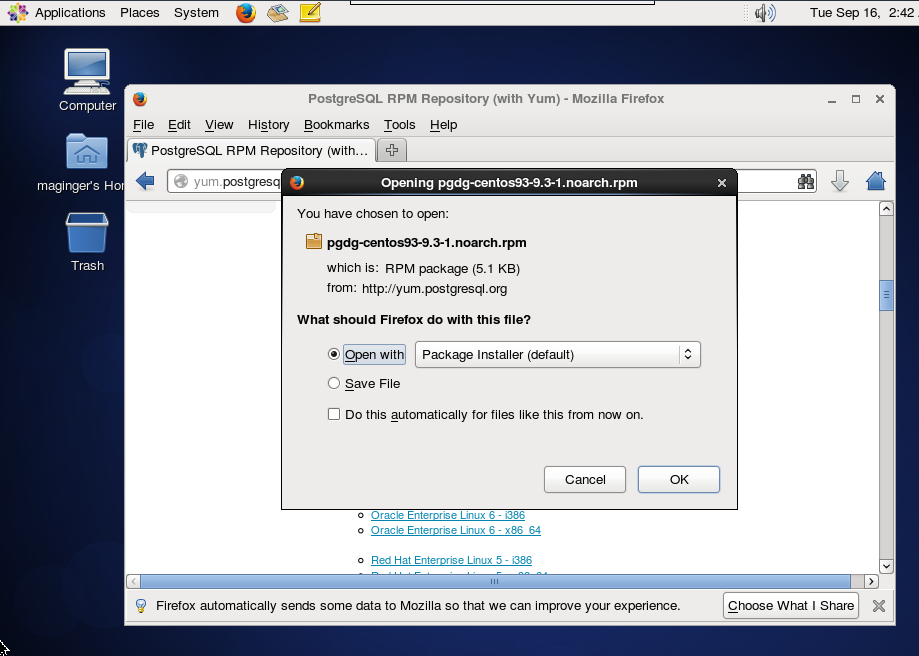
OK押すともう一度確認画面が出てくるので installを進める。
もちろんルートのパスワードの確認されるので、これも入力。
ここからまた設定。
データベースを初期化
サービスの起動
サービスの起動を起動時にも反映
# service postgresql-9.3 initdbInitializing database: [ OK ]# service postgresql-9.3 startStarting postgresql-9.3 service: [ OK ]# chkconfig postgresql-9.3 on
ちなみに設定ファイルはここにあった。(いろいろな情報があるのだけど、私のケースは /var/lib/pgsql/9.3/data だった。
# pwd
/var/lib/pgsql/9.3/data
# ls
base         pg_ident.conf  pg_serial     pg_subtrans  pg_xlog
global       pg_log         pg_snapshots  pg_tblspc    postgresql.conf
pg_clog      pg_multixact   pg_stat       pg_twophase  postmaster.opts
pg_hba.conf  pg_notify      pg_stat_tmp   PG_VERSION   postmaster.pid
postgresql.conf の設定で時間など合わせておく。
log_timezone = "Asia/Tokyo" timezone = "Asia/Tokyo"# These settings are initialized by initdb, but they can be changed. lc_messages = 'ja_JP.UTF-8'
# locale for system error message
# strings lc_monetary = 'ja_JP.UTF-8'
# locale for monetary formatting lc_numeric = 'ja_JP.UTF-8'
# locale for number formatting lc_time = 'ja_JP.UTF-8'
# locale for time formatting
後日記:
あとで必要になります。次の行も pg_hba.confに追加しておいてください。
(この設定がないと Database port error となりました。)
修正前#listen_addresses = 'localhost'#port = 5432修正後listen_addresses = '*'port = 5432
あと、すっかり忘れていたけど、CentOS の時間も合わせておきます。
デスクトップから修正してしまえば簡単。

PostgresSQLの設定を変えた場合はリスタートしておきます。
# service postgresql-9.3 restartStopping postgresql-9.3 service: [ OK ]Starting postgresql-9.3 service: [ OK ]#
PostgreSQL はインストールするとユーザー postgres を(勝手に)作成する。これはDBにとってはスーパーユーザーとなるので心してパスワードを設定しましょう。
# id postgresuid=26(postgres) gid=26(postgres) groups=26(postgres)# passwd postgresChanging password for user postgres.New password:Retype new password:passwd: all authentication tokens updated successfully
で、Postgres ユーザーに su(substitute user)して、DBユーザー(ロール・役割)を設定します。
# id postgresuid=26(postgres) gid=26(postgres) groups=26(postgres)# passwd postgresChanging password for user postgres.New password:Retype new password:passwd: all authentication tokens updated successfully
おお、起動した。PostgreSQL8.4アンインストールして 9.3入れ直したときはだめだったけど。とりあえず先に進むことができる。。。
ネットでいろいろ見てみると、iDempiere で使用するDBは、DBユーザー名(ロール)はadempiere、DB名は idempiere である必要があるようです。
PostgreSQL 必須設定
DBユーザー名:adempiere
DB名:idempiere
# su - postgres-bash-4.1$ psqlpsql (9.3.5)Type "help" for help.postgres-# \duList of rolesRole name | Attributes | Member of-----------+------------------------------------------------+-----------postgres | Superuser, Create role, Create DB, Replication | {} postgres-# \q -bash-4.1$
iDempiere のDB名は idempiere である必要があるようです。再作成しました。
でも失敗、エラーメッセージが出てきて失敗。(前回はテンプレートの指定をしなかったので問題とならなかったようです。)
-bash-4.1$ createdb --template=template0 -E UNICODE -O adempiere -U adempiere idempiere
createdb: could not connect to database template1: FATAL:  Peer authentication failed for user "adempiere"

-bash-4.1$ exit
エラーメッセージググってみると、海外のQ&Aでpg_hba.conf修正しろと出ていたので試しに修正したところ無事進みました。
# vi /var/lib/pgsql/9.3/data/pg_hba.conf

オリジナル
==> pg_hba.conf <==
local   all             all               peer


修正      ==> pg_hba.conf <==
local   all             all               trust
ちなみに他の行も後々のために変えておいた方が良いかもしれませんが、今回は1行のみ修正しました。
後日記:
あとで必要になります。次の行も pg_hba.confに追加しておいてください。
(この設定がないと JDBC 接続エラーとなりました。)
host all all 0.0.0.0/0 trust
ググると 192.168.0.0/24 trust を追加するなどありましたが、おそらくこれは自宅サーバーで自宅LANアドレスを 192.168.0.xx とした場合の設定だと思います。AWS のような外部環境ではこれは使えません。
ちなみに 0.0.0.0になるとどこからでもアクセスできることになるので、ここのアドレスは AWS の Private IPs にしておいた方が良いと思います。
PostgreSQLの設定を変えたので、ここでPostgreSQLのサービスリスタートします。
# service postgresql-9.3 restartStopping postgresql-9.3 service: [ OK ]Starting postgresql-9.3 service: [ OK ]#
再度 createdb 実行。
-bash-4.1$ createdb --template=template0 -E UNICODE -O adempiere -U adempiere
-bash-4.1$ psqlpsql (9.3.5) Type "help" for help.
postgres=# \l
List of databases
Name | Owner | Encoding | Collate | Ctype | Access privile ges -----------+-----------+----------+-------------+-------------+--------------- idempiere | adempiere | UTF8 | en_US.UTF-8 | en_US.UTF-8 | postgres | postgres | UTF8 | en_US.UTF-8 | en_US.UTF-8 | template0 | postgres | UTF8 | en_US.UTF-8 | en_US.UTF-8 | =c/postgres template1 | postgres | UTF8 | en_US.UTF-8 | en_US.UTF-8 | =c/postgres (4 rows) postgres=#
ちゃんとできているようです。
どうやら以下の設定も必要なようです。一応コマンドを打っておきました。
postgres=# CREATE SCHEMA adempiere;
postgres=# ALTER ROLE adempiere SET search_path TO adempiere, pg_catalog;postgres-# \q
-bash-4.1$ exit
#
でも使えるの? -d オプションで今作ったDBにアクセス、 -U オプションで adempiereユーザーでログインしてテーブル操作してみました。
-bash-4.1$ psql -d idempiere -U adempiere
psql (9.3.5) Type "help" for help.
idempiere=# create table test1 (column1 integer);
idempiere=# \d
List of relations Schema | Name | Type | Owner
--------+-------+-------+----------
public | test1 | table | idempiere (1 row)
idempiere=# insert into test1 values (1);
INSERT 0 1
idempiere=# select * from test1;
column1 --------- 1 (1 row)
idempiere=# insert into test1 values (123);
INSERT 0 1 idempiere=# select * from test1;
column1 --------- 1 123 (2 rows)
idempiere=# \q-bash-4.1$ exit#
なんか良さそう。ちゃんとテーブル作れて、値をセットして、呼び出しができている。
いろいろなバージョンやOSとの組み合わせで様々な情報があって、目指すところに来るのは大変でしたが、とりあえずは PostgresSQLまでOK。
次はJDKのインストールです。
----------余談。テーブルのドロップ---------
# su - postgres

-bash-4.1$ psql

psql (9.3.5)
Type "help" for help.

postgres=# \l

                                    List of databases

     Name     |  Owner   | Encoding |   Collate   |    Ctype    |   Access privil
-------------+----------+----------+-------------+-------------+----------------
 idenpiereDB | postgres | UTF8     | en_US.UTF-8 | en_US.UTF-8 |
 postgres    | postgres | UTF8     | en_US.UTF-8 | en_US.UTF-8 |
 template0   | postgres | UTF8     | en_US.UTF-8 | en_US.UTF-8 | =c/postgres
 template1   | postgres | UTF8     | en_US.UTF-8 | en_US.UTF-8 | =c/postgres
(4 rows)

postgres=# \q

-bash-4.1$

-bash-4.1$ dropdb idenpiereDB

-bash-4.1$ psql

psql (9.3.5)
Type "help" for help.

postgres=# \l

                                   List of databases

    Name    |  Owner   | Encoding |   Collate   |    Ctype    |   Access privileg
-----------+----------+----------+-------------+-------------+------------------
 postgres  | postgres | UTF8     | en_US.UTF-8 | en_US.UTF-8 |
 template0 | postgres | UTF8     | en_US.UTF-8 | en_US.UTF-8 | =c/postgres
 template1 | postgres | UTF8     | en_US.UTF-8 | en_US.UTF-8 | =c/postgres
(3 rows)

postgres=# \q
0 件のコメント:
コメントを投稿